搜索到
95
篇与
的结果
-
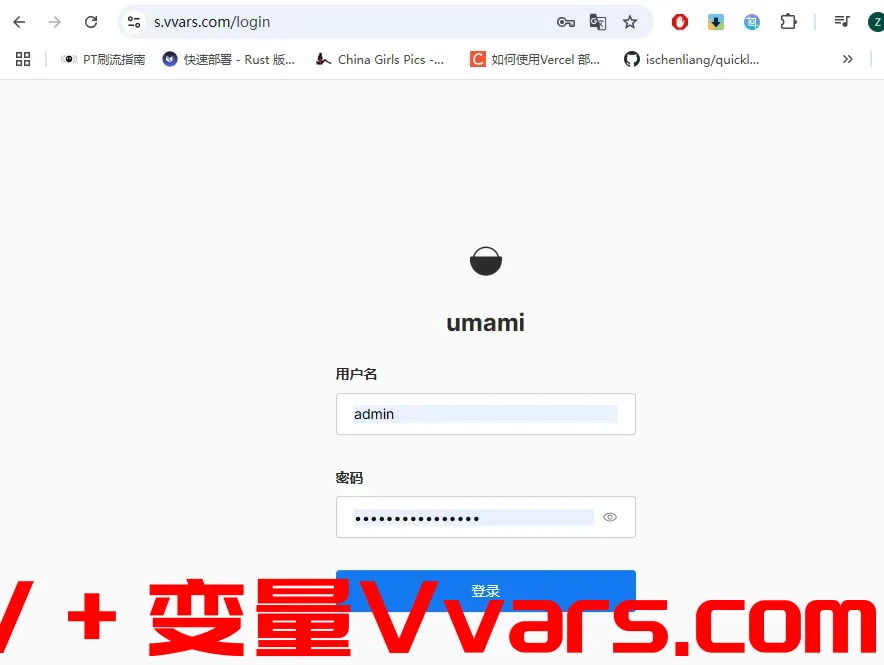
 自建网站统计工具-免费开源的网站访问流量统计分析平台Umami 前言Umami统计功能不多,但足以用于日常小站统计使用。1 官网官网:https://umami.is演示:https://eu.umami.is/share/LGazGOecbDtaIwDr/umami.is项目:https://github.com/mikecao/umami部署完成后的地址:https://s.vvars.com2 要求具有 Node.js 版本 18.18 或更高版本的服务器数据库。Umami支持MariaDB(最低版本v10.5)、MySQL(最低版本v8.0)和PostgreSQL(最低版本v12.14)数据库。二安装教程本文介绍如何在VPS上安装Umami,关于在Docker上安装Umami,可以参考本站文章:免费开源的网站访问流量统计分析平台Umami的Docker安装方式实战。1 安装 Yarnnpm install -g yarn2 获取源代码并安装软件包git clone https://github.com/umami-software/umami.git cd umami yarn install3 配置Umami1)在umami目录下创建.env文件,包含以下内容:DATABASE_URL=连接URL2)连接URL格式:postgresql://用户名:mypassword@localhost:5432/mydb mysql://用户名:mypassword@localhost:3306/mydb4. 构建应用程序yarn build如果您是首次安装,构建步骤将在您的数据库中创建表。它会创建一个名为 admin、password 的 umami 登录用户。5 启动应用程序yarn start默认情况下,这将在启动应用程序上http://localhost:3000。您需要代理来自Web服务器的请求或更改端口才能直接为应用程序提供服务。6 Umami域名配置Umami上面的安装已经完成了,但是只能使用IP+端口访问,我们这里就要利用到Nginx反向绑定域名的方法来实现Umami域名访问了。代码如下: location / { proxy_pass http://127.0.0.1:3000; proxy_set_header X-Real-IP $remote_addr; proxy_set_header Host $host; proxy_set_header X-Forwarded-For $proxy_add_x_forwarded_for; }如果你用的是LNMP或者Oneinstack一键安装包,找到Nginx配置文件,然后添加以上反向绑定域名的代码即可。配置方法和Bitwarden自建密码存储系统图文教程绑定域名反代类似,主要调整你的反代部分,示例如下:server { listen 443 ssl http2; #listen [::]:443 ssl http2; server_name s.vvars.com ; index index.html index.htm index.php default.html default.htm default.php; root /home/wwwroot/wzfou.com; location / { proxy_pass http://127.0.0.1:3000; proxy_set_header X-Real-IP $remote_addr; proxy_set_header Host $host; proxy_set_header X-Forwarded-For $proxy_add_x_forwarded_for; } ssl_certificate /usr/local/nginx/conf/ssl/tmth.wzfou.me/fullchain.cer; ssl_certificate_key /usr/local/nginx/conf/ssl/tmth.wzfou.me/tmth.wzfou.me.key; ssl_session_timeout 5m; ssl_protocols TLSv1 TLSv1.1 TLSv1.2 TLSv1.3; ssl_prefer_server_ciphers on; ssl_ciphers "TLS13-AES-256-GCM-SHA384:TLS13-CHACHA20-POLY1305-SHA256:TLS13-AES-128-GCM-SHA256:TLS13-AES-128-CCM-8-SHA256:TLS13-AES-128-CCM-SHA256:EECDH+CHACHA20:EECDH+CHACHA20-draft:EECDH+AES128:RSA+AES128:EECDH+AES256:RSA+AES256:EECDH+3DES:RSA+3DES:!MD5"; ssl_session_cache builtin:1000 shared:SSL:10m; # openssl dhparam -out /usr/local/nginx/conf/ssl/dhparam.pem 2048 ssl_dhparam /usr/local/nginx/conf/ssl/dhparam.pem; access_log /home/wwwlogs/tmth.wzfou.me.log; }
 -
用grok3搓了一个磁力链接清理工具,适用于草榴中带广告的磁力链接 原帖来自nodeseek的jsllxx大佬:1 工具简介最近下动作片的时候发现除了正片老是下载一堆广告文件夹就搓了一个清理工具,只下载正片文件夹适用于什么情况呢,适用于网盘添加磁力链接无法选择下载什么文件的时候如果有需要的可以用一下<!DOCTYPE html> <html lang="zh-CN"> <head> <meta charset="UTF-8"> <meta name="viewport" content="width=device-width, initial-scale=1.0"> <title>磁力链接清理工具</title> <style> body { font-family: 'Segoe UI', Tahoma, Geneva, Verdana, sans-serif; background: linear-gradient(135deg, #e0eafc, #cfdef3); margin: 0; padding: 20px; display: flex; flex-direction: column; align-items: center; min-height: 100vh; } .container { background: white; padding: 20px; border-radius: 10px; box-shadow: 0 4px 8px rgba(0, 0, 0, 0.1); width: 90%; max-width: 700px; } h2 { color: #333; text-align: center; margin-bottom: 20px; } .input-box { margin: 15px 0; } label { font-size: 16px; color: #555; margin-bottom: 5px; display: block; } textarea { width: 100%; height: 150px; padding: 10px; font-size: 14px; border: 1px solid #ddd; border-radius: 5px; resize: vertical; box-sizing: border-box; background-color: #f9f9f9; } textarea[readonly] { background-color: #f0f0f0; } .button-group { text-align: center; margin-top: 20px; } button { padding: 10px 25px; font-size: 16px; border: none; border-radius: 5px; cursor: pointer; transition: background-color 0.3s; margin: 0 10px; } #convertBtn { background-color: #4CAF50; color: white; } #convertBtn:hover { background-color: #45a049; } #copyBtn { background-color: #2196F3; color: white; } #copyBtn:hover { background-color: #1e87db; } #clearBtn { background-color: #f44336; color: white; } #clearBtn:hover { background-color: #da190b; } </style> </head> <body> <div class="container"> <h2>磁力链接清理工具</h2> <div class="input-box"> <label for="inputMagnet">输入处理前的磁力链接(支持多行):</label> <textarea id="inputMagnet" placeholder="粘贴你的磁力链接,每行一个,例如: magnet:?xt=urn:btih:72745371c77dd2a630d7dece1e120f88bdbea93b&dn=MIDA-022-C&tr=... magnet:?xt=urn:btih:abcdef1234567890abcdef1234567890abcdef12&tr=..."></textarea> </div> <div class="button-group"> <button id="convertBtn" onclick="cleanMagnet()">转换</button> <button id="copyBtn" onclick="copyResult()">复制结果</button> <button id="clearBtn" onclick="clearContent()">清除</button> </div> <div class="input-box"> <label for="outputMagnet">处理后的磁力链接:</label> <textarea id="outputMagnet" placeholder="处理结果会显示在这里,每行一个" readonly></textarea> </div> </div> <script> function cleanMagnet() { // 获取输入框内容并按行分割 const input = document.getElementById("inputMagnet").value.trim(); const lines = input.split('\n'); const pattern = /(magnet:\?xt=urn:btih:[0-9a-fA-F]{40})(&dn=[^&]*)?/i; let results = []; // 处理每一行 lines.forEach(line => { const match = line.match(pattern); if (match) { const result = match[2] ? match[1] + match[2] : match[1]; results.push(result); } else if (line.trim()) { // 非空行但无效时提示 results.push("无效的磁力链接: " + line.trim()); } }); // 输出结果 document.getElementById("outputMagnet").value = results.join('\n'); } function copyResult() { const output = document.getElementById("outputMagnet"); output.select(); document.execCommand("copy"); alert("已复制到剪贴板!"); } function clearContent() { // 清除两个输入框的内容 document.getElementById("inputMagnet").value = ""; document.getElementById("outputMagnet").value = ""; } </script> </body> </html>懒人专用在线地址:https://www.vvars.com/tools/cl-clear/
-
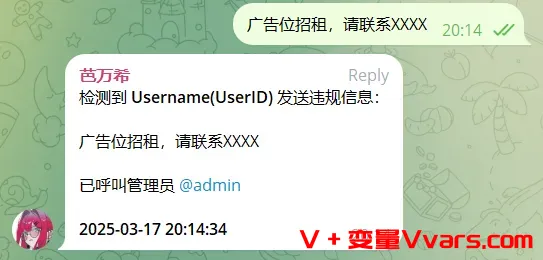
利用 Telegram 转发器实现轻量群违规词检测小助手,可接入Ai 详细的设置步骤:1. 绑定群聊直接在当前群聊发送 /bind 群聊名字或链接 直接绑定自己。2. 配置消息模板用户信息模板:在“其他设置”中,将模板设置为:检测到 **{name}({id})** 发送违规信息:时间模板:设置模板为:已呼叫管理员 @admin **{time}**3. 主菜单常规设置显示设置: 开启“原始发送者:显示”和“发送时间:显示”选项。添加白名单关键词:使用 /add 命令添加关键词(例如:"广告"),完成基础配置。4. 接入 AI 智能处理(可选)AI 功能开启:在 AI 设置中开启“AI处理”以及“AI处理后再次执行关键字过滤”。设置提示词:输入以下提示词:检测以下群聊消息是否为广告,如果是请返回原消息内容并附带上不超过20个字的原因解析。如果不是,请只返回"非广告":关键字过滤配置:返回主菜单后,将过滤模式设置为“先白名单后黑名单”,并切换关键字添加模式为“黑名单”,使用 /add 添加关键词“非广告”。5. 违规消息自动删除(可选)如需立即删除违规消息,可在主菜单中开启“删除原消息”功能。GitHub:https://github.com/Heavrnl/TelegramForwarder
-
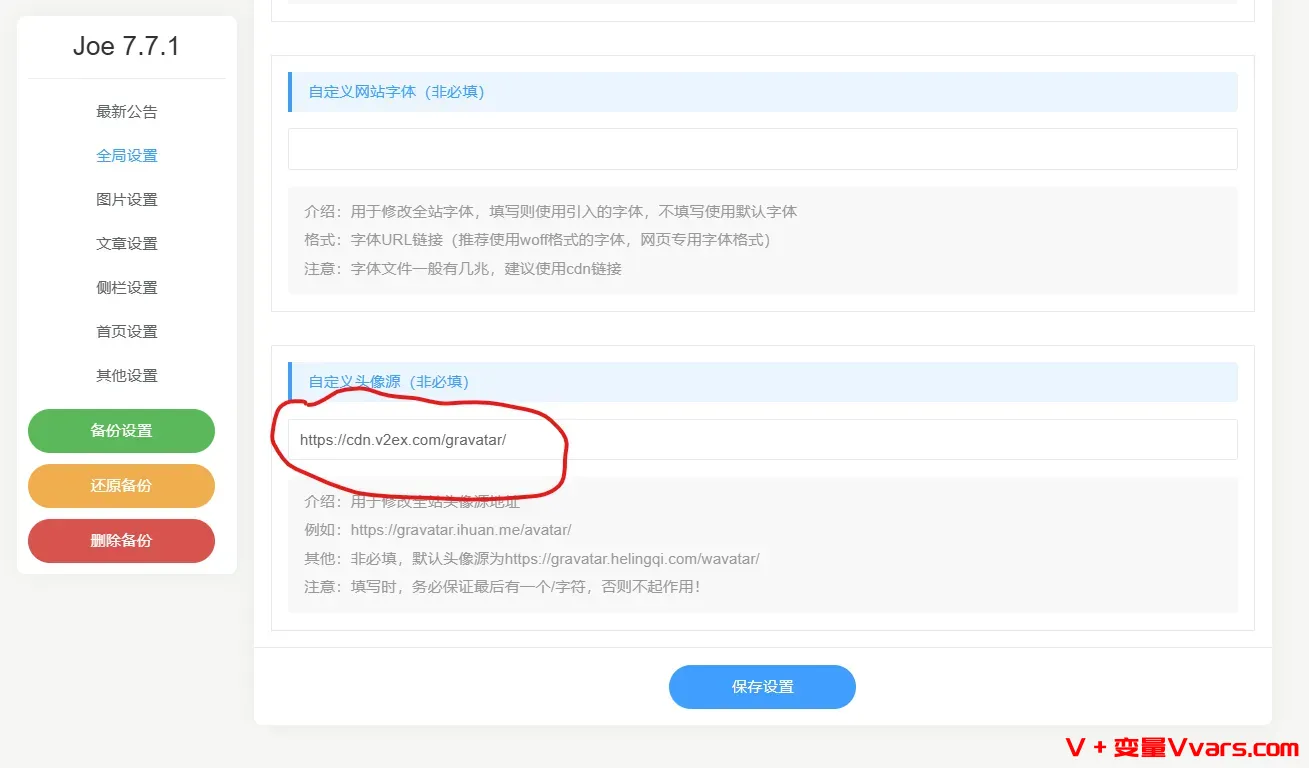
更换typecho Joe主题中的头像源,修复图像无法显示问题 1 关于GravatarGravatar 是 WordPress 提供的服务,只要在 gravatar.com 使用邮箱注册一个账号,然后上传头像,然后使用 Gravatar API 的网站就能够基于邮箱来显示头像。但Gravatar 访问很慢但是 Gravatar 部分 CDN 服务器(如 https://cn.gravatar.com,http://0.gravatar.com,http://1.gravatar.com)在国内访问困难,出现头像无法显示的问题。2 typecho Joe主题中的头像源问题而typecho Joe主题中的头像源gravatar.helingqi.com/wavatar由于年久失修,同样显示不正常,经常会出现X,十分影响观感。3 解决办法将图像源替换为 v2ex 的 Gravatar 镜像。名称地址V2EXhttps://cdn.v2ex.com/gravatar/具体路径为typecho后台——概要-外观——Joe主题——编辑外观——全局设置——自定义头像源,如下图所示。最终效果见本站,头像能正常显示了。4 其他头像源1) Loli源(已失效)~~地址: https://gravatar.loli.net/avatar/速度:623ms测试url:https://gravatar.loli.net/avatar/17d023413c0fcc40e5134ad286a2c030?s=256&d=~~2)极客族源地址:https://sdn.geekzu.org/avatar/速度:455ms测试url:https://sdn.geekzu.org/avatar/17d023413c0fcc40e5134ad286a2c030?s=256&d=备注:源恢复了,但是速度比起以前慢很多了,以前都是在100ms以内3)webp源地址:https://gravatar.webp.se/avatar/速度:378ms测试url:https://gravatar.webp.se/avatar/17d023413c0fcc40e5134ad286a2c030?s=256&d=备注: 这个webp的源会把头像转成webp格式,体积会大幅压缩,所以其他源获取的图片都是五十多kb,而这个源体积只有几kb备注2:这个源不知道是采用了什么样的缓存策略,第一次访问总是会很慢,1.5秒、2秒甚至3秒,相当于一段时间不访问,下次再访问的时候第一次请求就会很慢,就是这么诡异,原因未知。4)cravatar源地址:https://cravatar.cn/avatar/速度:149ms测试url:https://cravatar.cn/avatar/17d023413c0fcc40e5134ad286a2c030?s=256&d=5)libravatar源地址:https://seccdn.libravatar.org/avatar/速度:607ms测试url:https://seccdn.libravatar.org/gravatarproxy/17d023413c0fcc40e5134ad286a2c030?s=256备注:跟webp源类似,第一次访问比较慢。6)zeruns博客源地址:https://gravatar.zeruns.tech/avatar/速度:45ms测试url:https://gravatar.zeruns.tech/avatar/17d023413c0fcc40e5134ad286a2c030?s=256&d=备注:zeruns博客博主的源,速度很快 (偶尔失灵只能展示默认头像)
-
7zip进阶教程之二:批量压缩子文件夹为独立压缩包并加密,利用deepseek修改代码 一 前言之前本站介绍过如何利用bat批处理命令和7zip批量压缩文件:7zip进阶教程——巧用7zip批量压缩文件并加密.批量压缩子文件夹为独立压缩包并加密具体命令为:for /d %%X in (*) do "D:\soft\7-Zip\7z.exe" a "%%~dpnX.7z" "%%X" -pwww.xboy.uk -mhe -mx=0注:7zip安装目录 D:\soft\7-Zip\7z.exepwww.xboy.uk p后面的为压缩密码,即www.xboy.uk-mhe 加密文件名-mx=0 意思是压缩等级0(存储,不压缩)。数字越大压缩得越厉害。最小为0,最大为9正常情况下压缩都没有问题,但针对子目录有特殊字符(.\空格\!等)的时候,容易出现目录不完整的情况。如果你赶时间,可以直接跳到最后一步获取代码,前面我尝试了四次都是失败。二 利用deepseek来处理问题尝试1deepseek AI工具是一款非常优秀和逻辑能力强的人工智能软件,今天我们利用deepseek来指导如何解决。1 问题分析命令 for /d %%X in (*) do "D:\soft\7-Zip\7z.exe" a "%%~dpnX.7z" "%%X" -pwww.xboy.uk -mhe -mx=0 无法正确识别文件夹目录,可能由以下原因导致:1)7z格式未明确指定:-mhe 参数(加密文件名)仅适用于7z格式,但命令中未通过 -t7z 指定格式,可能导致默认格式不兼容。2)路径引用问题:若文件夹名含空格或特殊字符,路径需完整包裹引号。虽然命令中已使用引号,但输出文件名或源路径可能仍存在解析问题。文件夹结构处理:命令中 "%%X" 指向文件夹本身,可能导致压缩包包含冗余层级(如将父目录打包)。需调整路径为文件夹内所有内容。3)7z.exe路径或版本问题:路径错误或旧版本7-Zip可能不支持某些参数(如 -mhe)。2 解决方案明确指定7z格式在命令中添加 -t7z 参数,确保加密文件名功能生效:for /d %%X in (*) do "D:\soft\7-Zip\7z.exe" a -t7z "%%~dpnX.7z" "%%X\" -pwww.xboy.uk -mhe -mx=0关键修改:添加 -t7z,并在源路径 "%%X" 后追加反斜杠 \,表示压缩文件夹内所有内容而非文件夹本身。处理特殊字符与空格若文件夹名含空格,需确保路径被完整引用:for /d %%X in (*) do "D:\soft\7-Zip\7z.exe" a -t7z "%%~dpnX.7z" "%%~X\" -pwww.xboy.uk -mhe -mx=0说明:"%%~X\" 中的 ~ 会移除路径外的引号,再通过反斜杠确保解析正确性。验证7z.exe路径与版本检查路径 D:\soft\7-Zip\7z.exe 是否存在,或尝试替换为环境变量 "%ProgramFiles%\7-Zip\7z.exe"。升级7-Zip至最新版本(建议v22.01+),确保支持 -mhe 参数。测试命令与调试在CMD中临时执行(非批处理文件)时,将 %%X 改为 %X:for /d %X in (*) do "D:\soft\7-Zip\7z.exe" a -t7z "%~dpnX.7z" "%X\" -pwww.xboy.uk -mhe -mx=0查看错误提示,若提示“拒绝访问”,需以管理员身份运行CMD。3 完整修正命令示例@echo off setlocal enabledelayedexpansion for /d %%X in (*) do ( "D:\soft\7-Zip\7z.exe" a -t7z "%%~dpnX.7z" "%%X\" -pwww.xboy.uk -mhe -mx=0 )优化点:启用延迟变量扩展(setlocal enabledelayedexpansion)以避免特殊字符解析问题。注意事项:若需压缩到其他目录,修改输出路径(如 "D:\output\%%~nX.7z")并确保有写入权限。-mx=0 表示无压缩仅存储,若需压缩可调整为 -mx=9(最高压缩率)。通过上述调整,命令应能正确识别并批量压缩文件夹。如仍报错,请提供具体错误信息以便进一步排查。三 利用deepseek来处理问题尝试2原来以为采用上一步的修改命令就能解决问题了,结果发现但文件目录中存在.的时候,压缩时会直接忽略.后面的目录名称,导致生产的压缩包名称不完整。于是继续问deepseek。1问题原因当文件夹名称中包含 . 符号时,%%~dpnX 变量会截断 . 后的内容,导致生成的压缩包名称不完整。例如:文件夹名:Project.v1.2错误输出:Project.7z(丢失 .v1.2 部分)2 解决方案改用 %%~nx 变量提取完整文件夹名,并手动拼接路径和 .7z 后缀:for /d %%X in (*) do ( "D:\soft\7-Zip\7z.exe" a -t7z "%%~dpX%%~nX.7z" "%%X\" -pwww.xboy.uk -mhe -mx=0 )关键修改:%%~dpX:提取文件夹的完整路径(盘符+路径,不含名称)%%~nX:提取文件夹的完整名称(包含所有 . 符号)拼接逻辑:"%%~dpX%%~nX.7z" → 生成完整路径+名称的压缩包示例验证文件夹路径:D:\data\Project.v1.2原命令输出:D:\data\Project.7z修正后输出:D:\data\Project.v1.2.7z3 完整命令模板@echo off for /d %%X in (*) do ( "D:\soft\7-Zip\7z.exe" a -t7z "%%~dpX%%~nX.7z" "%%X\" -pwww.xboy.uk -mhe -mx=0 ) pause4 注意事项若路径含空格,需保留引号:"%%~dpX%%~nX.7z"测试前建议备份数据,避免误操作。四 利用deepseek来处理问题尝试3原以为折腾两次肯定能解决了,结果发现好事多磨,采用第二次尝试的代码也没有解决.后面的目录名被截断的问题。1 问题核心当使用 %%~dpnX 变量时,批处理会默认将文件名中 第一个.后的内容识别为扩展名 并截断。若文件夹名含多个.(如 Folder.v1.2),会导致压缩包名称丢失 .v1.2 部分。2 解决方案通过 分离路径与名称 并 手动拼接,确保压缩包名称完整:@echo off for /d %%X in (*) do ( "D:\soft\7-Zip\7z.exe" a -t7z "%%~dpX%%~nX.7z" "%%X\" -pwww.xboy.uk -mhe -mx=0 )关键参数说明|变量 |作用 |示例(文件夹路径:D:\data\Project.v1.2)||%%~dpX |提取文件夹的完整路径 |D:\data||%%~nX |提取文件夹的完整名称 |Project.v1.2||拼接结果 |"%%~dpX%%~nX.7z" |D:\data\Project.v1.2.7z|3 效果对比|原命令 (%%~dpnX.7z) |修正后 (%%~dpX%%~nX.7z)||Project.7z |Project.v1.2.7z|附加说明1)路径含空格:若文件夹路径含空格,保留引号确保解析正确:"%%~dpX%%~nX.7z" → 保持原样即可,无需额外处理2)压缩格式:-t7z 确保启用加密文件名功能(-mhe 仅对7z格式有效)4 调试建议:在CMD中临时测试时,将 %%X 改为 %X:for /d %X in (*) do echo "%~dpX%~nX.7z"此命令仅显示生成的压缩包路径,不会实际压缩。通过此方案,可确保文件夹名称中的 . 符号完整保留在压缩包名称中。五 利用deepseek来处理问题尝试4让人头疼的是,利用第四步的代码还是没有解决问题,我被折腾的没脾气了,俗话说事不过三,我上次尝试完了依然没解决问题。菜鸡难,被折腾的体无完肤的菜鸡更难,但是我还没死心,抱着最后一次希望又去问deepseek了。在批处理脚本中,文件名截断问题通常由变量修饰符对扩展名的误判导致。以下是系统性解决方案及技术细节分析:1变量修饰符截断原理批处理的%%~nX变量默认将文件名中第一个.后的内容识别为扩展名。例如路径Project.v1.2会被解析为:%%~nX → Project(.v1.2被误判为扩展名)%%~xX → .v1.22完整保留名称的解决方案1) 路径与名称分离拼接法通过组合%%~dpX(完整路径)和%%~nX(原始名称)实现:"%%~dpX%%~nX.7z"示例:文件夹D:\data\Project.v1.2 → 压缩包路径D:\data\Project.v1.2.7z优势:兼容含多个.的复杂名称,无需修改系统配置2) 延迟环境变量扩展启用enabledelayedexpansion避免特殊符号干扰:setlocal enabledelayedexpansion for /d %%X in (*) do ( set "folder=%%X" "7z.exe" a "!folder!.7z" "%%X\" )适用场景:名称含!、^等特殊符号时3) 第三方工具辅助使用dir /b获取原始名称,避免批处理变量解析:for /f "delims=" %%X in ('dir /b /ad') do ( "7z.exe" a "%%X.7z" "%%X\" )原理:dir /b直接输出未处理的原始名称3 关键注意事项1)空格路径处理路径含空格时需保留双引号:"%%~dpX%%~nX.7z" → 自动处理空格,无需额外转义2)压缩格式影响7z格式支持-mhe加密文件名(ZIP格式无此功能)扩展名建议显式声明:-t7z强制指定格式3)调试技巧使用echo预验证路径:for /d %X in (*) do echo "%~dpX%~nX.7z" # CMD直接测试时用%X这次尝试depseek没有对代码进行修正,但第三方工具辅助中提出使用dir /b获取原始名称,避免批处理变量解析,这点非常关键,成为我们突破口。六 最终解决方案基于deepseek四次答复,最终得到如下的压缩代码,自用无任何问题。for /f "delims=" %%X in ('dir /b /ad') do ( "D:\soft\7-Zip\7z.exe" a "%%X.7z" "%%X\" -pwww.xboy.uk -mhe -mx=0 )
-
7zip进阶教程——巧用7zip批量压缩文件并加密 一前言1 关于7ZIP7ZIP是一款非常优秀的开源压缩软件,7-zip是一个不错的解压缩工具, 除了界面简介以外, 美中不足的就是没有批量压缩这个功能。7z的界面化操作, 实际是调用了命令行去执行解压缩, 既然知道了7z有命令行, 借助Windows的批处理(.bat),理论上是可以实现批量压缩文件/文件夹这个功能。2 7-Zip下载进入官网 下载 7-Zip-x643 环境参数系统版本: Windows 11 Version 21H2 7-Zip 安装位置: "D:\soft\7-Zip\" 7-Zip 版本: 7-Zip 21.06 (x64)如果压缩的时候文件夹名称还是缺失,可以查看本站另外一篇文章:7zip进阶教程之二:批量压缩子文件夹为独立压缩包并加密,利用deepseek修改代码.二 配置教程利用windows自带记事本将下述命令保存为.bat文件:注意: 需要将 .bat 文件的编码设为 ANSI , 否则中文可能会出现乱码1 压缩文件7z_Bulk_Files.batfor /f %%Z in ('dir /b') do "D:\7-Zip\7z.exe" a %%Z.7z %%Z pause参数说明:"D:\soft\7-Zip\7z.exe": 7-Zip的安装目录, 请自行替换为实际安装目录%%Z: 临时存储文件名/路径的变量%%Z.7z: 压缩后的文件名, %%Z需要与变量名一致pause: 按任意键关闭PowerShell窗口(可省略)测试目录树状图└─ Test_Dir ├─ 7z_Bulk_Files.bat ├─ Bamboo.mp3 ├─ img101.png └─ 图片100.jpg在 Test_Dir 目录下执行 7z_Bulk_Files.bat└─ Test_Dir ├─ 7z_Bulk_Files.bat.7z ├─ Bamboo.mp3.7z ├─ img101.png.7z └─ 图片100.jpg.7z2 压缩文件(加密)7z_Bulk_Encrypt_Files.batfor /f %%Z in ('dir /b') do "D:\7-Zip\7z.exe" a %%Z.7z %%Z -pwww.vvars.com -mhe pause参数说明:"D:\soft\7-Zip\7z.exe": 7-Zip的安装目录, 请自行替换为实际安装目录-pwww.vvars.com: 压缩文件的密码是 www.vvars.com-mhe: 加密文件名(可省略)测试目录树状图└─ Test_Dir ├─ 7z_Bulk_Encrypt_Files.bat ├─ img101.png ├─ img102.jpg ├─ 光年.mp3 └─ 图片100.jpg在 Test_Dir 目录下执行 7z_Bulk_Encrypt_Files.bat└─ Test_Dir ├─ 7z_Bulk_Encrypt_Files.bat.7z ├─ img101.png.7z ├─ img102.jpg.7z ├─ 光年.mp3.7z └─ 图片100.jpg.7z已知问题:文件名包含空格会导致该文件无法压缩会将bat脚本也一并压缩会将执行目录下的文件夹也一并压缩文件的原后缀不会"清除"3压缩目录7z_Bulk_Folders.batfor /d %%D in (.\*) do "D:\7-Zip\7z.exe" a "%%D.7z" "%%D\*" pause参数说明:"D:\7-Zip\7z.exe": 7-Zip的安装目录, 请自行替换为实际安装目录%%D: 临时存储目录路径的变量测试目录树状图└─ Test_Dir ├─ 7z_Bulk_Folders.bat ├─ img │ └─ img901.png ├─ music │ └─ 倒数.mp3 ├─ New folder │ └─ New Microsoft Word.docx └─ 图片 └─ 图片900.jpg在 Test_Dir 目录下执行 7z_Bulk_Folders.bat└─ Test_Dir ├─ img.7z ├─ music.7z ├─ New folder.7z └─ 图片.7z4压缩目录(加密)7z_Bulk_Encrypt_Folders.batfor /d %%D in (.\*) do "D:\7-Zip\7z.exe" a "%%D.7z" "-pwww.vvars.com" "-mhe" "%%D\*" pause参数说明:"D:\soft\7-Zip\7z.exe": 7-Zip的安装目录, 请自行替换为实际安装目录-pwww.vvars.com: 压缩文件的密码是 www.vvars.com-mhe: 加密文件名(可省略)测试目录树状图└─ Test_Dir ├─ 7z_Bulk_Encrypt_Folders.bat ├─ img │ └─ img901.png ├─ music │ └─ 倒数.mp3 ├─ New folder │ └─ New Microsoft Word.docx └─ 图片 └─ 图片900.jpg在 Test_Dir 目录下执行 7z_Bulk_Encrypt_Folders.bat└─ Test_Dir └─ img.7z └─ music.7z └─ New folder.7z └─ 图片.7z5 批量压缩文件夹,子文件夹独立压缩包并加密for /d %%X in (*) do "D:\soft\7-Zip\7z.exe" a "%%~dpnX.7z" "%%X" -pwww.vvars.com -mhe -mx=0注意: 需要将 .bat 文件的编码设为 ANSI , 否则中文可能会出现乱码
-
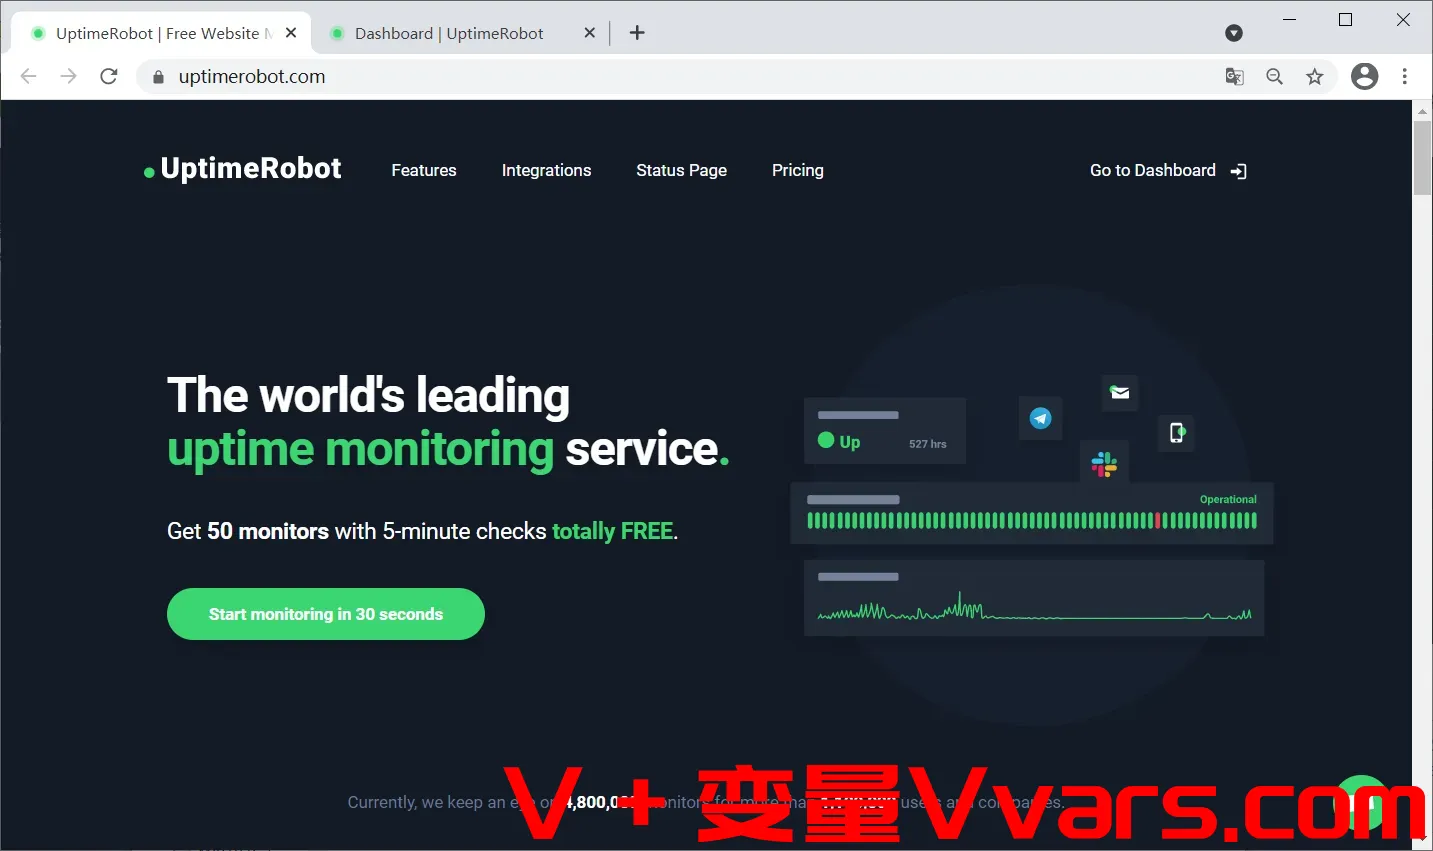
再谈网站状态监控利器-免费的网站运行状态监控工具——UptimeRobot 前言之前本站介绍过如何在VPS部署uptime kuma实现24小时网站状态监控:采用uptime kuma搭建开源网站运维,24小时自动监控你的网站状态。今天介绍的另外一款网站状态监测工具Uptime Robot。UptimeRobot是国外的一个网站监控服务,添加网站到监控列表之后,可以24小时监控网站的运行状态,当网站无法访问时会立即通知用户。该服务提供了免费和付费两个版本,免费版的服务是5分钟检测一次,这个频率对于我的个人网站来说已经足够,所以就不考虑付费了(白嫖怪嘤嘤嘤)。设置了监控服务之后,在UptimeRobot网站可以查看网站的监控状态,但是配置起来还挺麻烦的,访问速度也不快。因此不使用这种方式,而是基于官方提供的API,在本地搭建一个页面来显示网站的运行状态。要用到的是github上一个基于UptimeRobot API的项目。这是项目的github地址:https://github.com/yb/uptime-status将这个项目clone拉取到本地。一、将网站添加到监控列表进入UptimeRobot官网https://uptimerobot.com/,使用邮箱注册一个账号之后登陆,点击“Go to Dashboard”,进入监控仪表盘点击左上角“Add New Monitor”。按照如下设置给自己的网站添加监控:二、获取监控网站的api在仪表盘界面点击“My Setting”:往下找到“Read-only API Key”选项,点击最后一行的“Create the read-only API key”,创建一个API key,然后复制下这个API,后面会用到这个API key。三、修改项目文件打开刚才从github上拉取下来的项目文件夹,我们要修改其中的“config.js”这个文件,只需要修改“SiteName”、“SiteUrl”、“ApiKeys”这三项,,前两项就是网站名和网站链接,第三项改成上一步复制的Api Keys,最后还有一个项是“Navi”,是指页面右上角的导航栏菜单项,改不改都行,不影响前面的显示。这个具体的修改细则作者已经在注释中说的很详细了。整个修改完之后别忘了保存,然后打开 “index.html”,就能看到网站的运行状态了,大概是这样:接下来把整个项目文件扔到网站的目录下,就算是大功告成了。
-
采用uptime kuma搭建开源网站运维,24小时自动监控你的网站状态 一 前言作为网站站长,最担心的就是网站掉线不能访问,但个人站长没有那么多时间和精力时刻盯着网站,这个时候自动监控网站状态的程序就能让站长朋友解放出来。如果您像我一样在服务器上托管了多个网站,并且没有足够的时间来手动检查每个网站的在线状态,那么当出现问题时,您可能无法及时收到通知来处理这些问题。因此,搭建一个在线监控服务是很有必要的,它可以在状态异常时提醒您,以便您能够及时处理问题,确保网站的稳定性和可用性。更多网站监控可以查看[再谈网站状态监控利器-免费的网站运行状态监控工具——UptimeRobot](https://www.vvars.com/package-tool/Let-s-talk-about-the-website-status-monitoring-tool---the-free-website-operation-status-monitoring-tool---UptimeRobot.html)监控服务有很多,我最终选择了Uptime Kuma,因为Uptime Kuma是开源免费的,在GIthub上目前有65.7k Star! 它搭建非常方便,占用系统资源低。uptime kuma功能丰富:监控 HTTP(s) / TCP / HTTP(s) 关键字 / HTTP(s) Json 查询 / Ping / DNS 记录 / 推送 / Steam 游戏服务器 / Docker 容器的正常运行时间 精美、反应灵敏、快速的 UI/UX 通过 Telegram、Discord、Gotify、Slack、Pushover、电子邮件 (SMTP) 和90 多种通知服务发送通知,查看完整列表:https://github.com/louislam/uptime-kuma/tree/master/src/components/notifications 20 秒间隔 多语言 多个状态页面 将状态页面映射到特定域 Ping 图表 证书信息 代理支持 2FA 支持二 安装教程uptime kuma的安装较为简单,本节介绍如何在VPS上安装uptime kuma。1 条件准备uptime kuma支持windows和主流linux系统;✅ 主要 Linux 发行版,例如 Debian、Ubuntu、CentOS、Fedora 和 ArchLinux 等。 ✅ Windows 10 (x64)、Windows Server 2012 R2 (x64) 或更高版本 ❌ FreeBSD / OpenBSD / NetBSD ❌ Replit/Heroku运行需要的依赖:Node.js 18 / 20.4 npm 9 Git pm2-用于在后台运行 Uptime Kuma2 SSH登录VPS,安装依赖,依次执行下面代码apt update apt install npm -y apt install git -y3 Clone代码到VPSgit clone https://github.com/louislam/uptime-kuma.git4 打开uptime-kuma并安装启动程序cd uptime-kuma npm run setup5 安装pm2和pm2-logrotatenpm install pm2 -g pm2 install pm2-logrotate6 利用pm2启动后台服务pm2 start server/server.js --name uptime-kuma7 Uptime Kuma 现已在http://ip地址:3001上运行8 其他pm2命令# 查看当前控制输出 pm2 monit # 开机自启动 pm2 save && pm2 startup9 设置报警通知以tg为例:10添加需要监控的网站监控频率根据你的需要和服务器能力设置,我设置的是5分钟
-
在 Linux 上使用 WireGuard 协议设置 FastestVPN 一前言之前本站介绍过如何白嫖FastestVPN永久使用权:白嫖fastestvpn:免费为你的小鸡添加45+国家/100+地区落地永久出口,并解锁GPT/流媒体。本文介绍在 Linux 上设置 WireGuard 协议,本教程介绍如何通过命令行界面 (CLI) 在基于 Debian 的 Linux(Debian、Ubuntu、Mint、Kali 等)上设置 WireGuard 协议。二设置教程1 初始准备步骤通过运行sudo apt update && sudo apt upgrade命令来更新系统上的过时软件包。2 输入sudo -i切换到root用户并安装WireGuard。apt install wireguard -y3 在 WireGuard 目录中添加您的 WireGuard conf 文件。sudo nano /etc/wireguard/dallas.conf注意:在此示例中,配置文件名为“ dallas.conf ”,因为我们在文件中添加了达拉斯 VPN 服务器地址。您可以为配置文件选择任何名称,例如london.conf或任何您喜欢的名称。4 打开 FastestVPN 提供给您的 WireGuard 配置文件并复制其所有内容。如果没有 WireGuard .conf 文件,可以通过实时聊天联系或发送电子邮件给官方。5 现在将复制的文本粘贴到 /etc/wireguard/dallas.conf 中Linux WireGuard 设置6 按CTRL+O保存文件,然后按Ctrl+X关闭文件。7 最后,运行此命令以激活 WireGuard VPN。sudo wg-quick up dallas注意:在上面的命令中,添加你的 WireGuard 配置名称来代替dallas,并且不要在其后面添加.conf。8 要验证 VPN 连接,请输入:sudo wg您还可以访问theipinfo.com等网站来确认 VPN 是否正常运行。9 要断开 WireGuard VPN,请运行以下命令。sudo wg-quick down dallas10 在 Linux 上激活 WireGuard 后无法访问互联网如果连接到 WireGuard 隧道后失去互联网访问,请打开 .conf 文件并确保以“AllowedIPs”开头的行如下所示。(如下面的屏幕截图所示)AllowedIPs = 0.0.0.0/0如果仍然不起作用,请在文件的最后一行更改 VPN 服务器地址。
-
白嫖fastestvpn:免费为你的小鸡添加45+国家/100+地区落地永久出口,并解锁GPT/流媒体 一前言1 一次购买永久可用的软件fastestvpn搞推广了,白嫖软件不止,还能小赚。现价30美元,返利30.3美元。众所周知,MJJ们通常偏向于使用线路好的小鸡自建代理服务,享受小鸡带来的高可玩性、高拓展性与探索带来的乐趣,却又对机场提供的广泛的节点地域分布优势垂帘三尺,那么有没有一种可能,实现All in One,我全都要?偶然想到一个好活,国际传统VPN产品(例如Nord、Express、Surfshark等)一般均支持WireGuard协议,且不限流量、节点分布广、流媒体解锁优秀,正好Xray也支持WireGuard作为出站协议,那么能否购买传统VPN“套”到自己的VPS上,实现一拖全世界?基于此,发现一个极度合适的选择,fastestvpn在美国知名返利站TopCashback上提供返利101%,购买永久方案(送个1年密保软件,感觉用不上),全额返还白赚!fastestvpn的节点覆盖范围超过全球100个国家/地区,提供无限流量、15设备数、部分节点支持解锁GPT及流媒体等优势。且允许客户使用非官方客户端,非常适合作为小鸡代理出口使用。真不是fastestvpn广告,别家我都帮你们都看过了,返利比例都低.关于如何在linux配置wireguard可以参考:在 Linux 上使用 WireGuard 协议设置 FastestVPN。2 此方案可帮助解决的问题流媒体(Netflix/Disney+/动画疯等)、GPT的解锁及跨区问题 谷歌IP送中(具体表现为无法享受油管会员权益) 防止IP Abuse投诉造成的麻烦(例如跑BT容易吃DMCA等) 薅羊毛等特殊场景需要临时使用特定国家(地区)的节点 缓解IP太黑导致被部分网站封锁或频繁弹出验证码 突破机房或上游对特定网站进行的封锁(例如不少台湾商家会封锁.gov.tw站点、韩国会封锁部分色情网站) 更大限度保障互联网生活的隐私和安全性(机房和上游将无法知晓你访问过哪些网站) 为什么不选Warp? 有人说,为什么不选免费的Cloudflare Warp?虽说Warp也支持WireGuard作为Xray出口,但Warp的IP普遍太黑(部分IP甚至谷歌搜索都出验证码)、解锁需要靠刷IP、不支持指定其它国家/地区的节点出口。3关于风险 / 是不是灵车?TopCashback是美国知名返利网站(类似于国内的淘宝客),顾客通过其链接下单可获得现金返利奖励,不同品牌及类目的返利比例不同。TopCashback目前在TrustPilot上有1.2W条评价,评分为4.6分。4 关于返利周期和安全保障fastestvpn支持30天无理由退款、支持PayPal。TopCashback对于fastestvpn的101%返利需要等待约3个月后才能提现,但由于fastestvpn支持Paypal付款,而Paypal争议的保障期是六个月,综合考虑两个品牌的过往商誉,我个人认为风险并不算高,灵度较低。提现是绑定paypal就行了。二注册教程1注册TopCashback,并通过其入口下单注册链接注册完搜索fastestvpn即可看到101%返利活动,点击红色按钮会跳转到fastestvpn官网。注意:必须使用fastestvpn新账户下单,只有新账户才有返利!如果已经是老用户,建议更换浏览器下单,防止关联。建议找个可交易的邮箱注册,用不上这账号还可以卖给别人,纯赚。2 购买有中文界面,一路往下就可以。3 WINDOWS软件下载后,安装打开,登录后,这里改中文4 设置协议为WireGuard,这样就可以开始获取WireGuard的配置了。打开fastestvpn软件的安装目录,然后Resources\data子目录,连接自己需要的节点,然后在连接的时候,刚才打开的目录,会出现一个FastestVPNWireGuard.conf的配置文件,迅速打开它,在连接完成之后它会自动删除的。如果没打开前已经删除了也不要紧,可以直接问客服要一份WireGuard配置文件,这个VPN本来就支持的,可以用注册邮箱给[email protected]发邮件要求提供,正常客服看到后会尽快提供给你的。5 然后在你的X-UI面板添加出站设置再将你的某个已经创建好的线路指定出口,这样这条线路就是fastestvpn的IP了。6补充: 这软件国内能直连的节点较少,比较适合用于落地出口,如果想在本地使用的话,就不建议你入手了。7注意,过两天记得回返利网站看看,正常过6小时左右会显示返利30.3刀,如果返利过了三天还没生效,就去fastestvpn申请退款。